CS 385 : Who's That Pokemon

Do you know?
Introduction:
The goal of our project is to be able to correctly identify and name each Pokemon we are testing with, and to decipher the pose it is in, depending on the picture we gave it. We have a total of 5 poses for each pokemon that include; far left, left, straight, right, and far right. We created a large database of images to accurately implement our code. For each pokemon and pose, we needed enough pictures to be able to create a training set and a testing set. This meant that for each pose we had 6 images, 3 testing and 3 training, adding up to a grand total of 30 images per Pokemon.
On top of that, we also implemented color recognition. This implementation consisted of recognizing Pokemon based on their color. Based on how close in color a test image was to a training image, the computer would try to make a guess at the identity of the Pokemon.
Our code consisted of 2 main parts - eigenfaces and color recognition. We would first try to identify the Pokemon based on its color alone. This would become our Pokemon identity “guess”. Next, we use an eigenfaces tool to first decipher the Pokemon’s identity. Then, based on the former outcome, we project our findings into the appropriate eigenspace to lastly interpret which pose that Pokemon is in.
Approach/Algorithm
Color Recognition:
The main idea of this component is to recognize the Pokemon based on their dominant colors.
The beginning action is the selection of the testing image we will be comparing against the images we have saved away. First, the RGB image we have is changed to an HSV format, even though the only part we care about is the hue. The image is changed to one just showing the representation of the hue, which represents the colors that are currently in the image. To better represent this, the hue image is made into a histogram with each color on the x-axis and the amount of pixels that fit that color on the y-axis. From here, things got a little fuzzier.
The first iteration of this algorithm seemed straightforward on paper, but was quite hard to realize in practice. The plan was to take this histogram that had been created and turn the results into an array of eigenvalues. Afterwards, the program would start running through each of the training images he had accumulated, putting them through the same process as explained above and trying to find a value that gave a close enough match to our test image. In practice, this did not work well enough. This process could only reliably find a training image that was an exact match to the test image, and would not work for the project we had in mind.
With some assistance from Professor Gill, a new plan was made. Instead of trying to turn the histograms into arrays of values, it was much better to simply use the histograms themselves. After making hue histograms from both the test image and the training image the program is currently looking at, the operation pdist2 was used to produce a measurement of how close these graphs were to one another, with a decimal value between 0 and 1. From there, the program judged this value against a given threshold to determine if the two images were similar enough to show the same Pokemon.
Eigenfaces:
Assignment 3 served as our starter code for this portion of the project. The most time consuming piece of this was creating the dataset of images we were going to work with. As mentioned above, when creating eigenfaces in order to use facial recognition algorithms, a large set of training and testing images are needed. To accurately determine the identity of the image, we need to look at a few training images of each Pokemon to familiarize our program with that Pokemon’s distinctive features. This consisted of multiple images of the Pokemon in the frontal view pose, right view, left view, far right and far left views. Without these training images, our algorithms would be unable to pick out the features that tell us which Pokemon is which. The rest of the images in our dataset were used for testing. Each Pokemon had a few testing pictures with a few from each pose, and our algorithm was able to choose which Pokemon we gave it by using an eigenspace to determine the closest match.
To create our Identity Recognition algorithm, we first compute eigen-coefficients for each of the training sets. To use the images we had in our dataset, we needed to convert them from RGB images to grayscale for them to work with our algorithm. To predict the identity of each Pokemon, we use an eigenspace filled with multiple eigen-coefficients for each Pokemon and project our Pokemon-to-be-identified into the space. The algorithm will choose the closest match, and use that as our prediction. As we move through different values of k, we will make predictions and display our recognition rate.
This is where pose detection comes into play. After we determine which Pokemon we are working with, we want to use the same algorithm to create an individual eigenspace for each set of poses we have. We will project the picture we are working with into the eigenspace and determine which pose it most closely resembles, and use that as our final prediction.
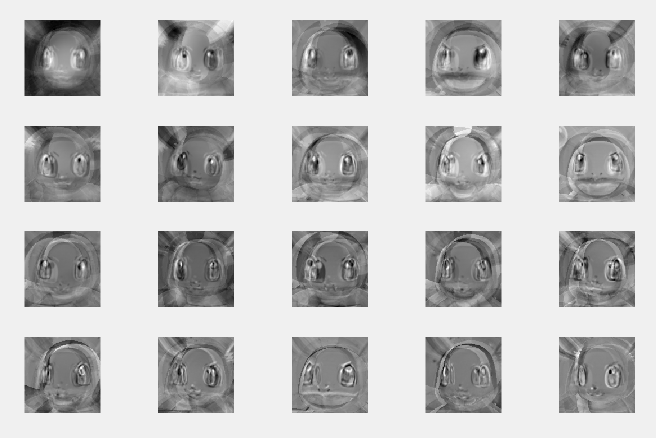
Eigenfaces used for facial recognition

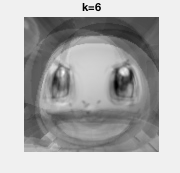
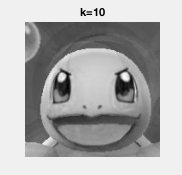
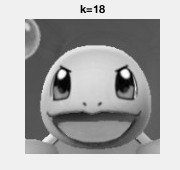
Different values of k
Results
Color Recognition:
When running and debugging the color recognition program, it was important to find a good threshold to hold the histogram difference to. A threshold of 0 would return no usable values, as no two pictures are exactly alike. On the other hand, if the threshold is too high, it would lead to false positives, with the program thinking recognizing a Pokemon as a completely different one. Through trial and error, the best threshold to use for the project was a histogram difference of 0.17. It is large enough to account for some of the more dramatic changes to an image, such as a Pokemon’s eyes being shut, but is still low enough to keep the program focusing on the correct Pokemon.

Eigenfaces:
The results we got for the facial recognition and pose detection portions of the project were best with the highest values of k we could use. As shown in some of our pictures, the test subjects were most clearly displayed with values of k that were closer to 20. Because of this we got our highest recognition rate, which was %94.44 with a value of k = 20.
Our pose detection did not turn out quite as well. While we got predictions that were not very accurate for frontal, left and right poses, our predictions for far left and far right poses were usually spot on. We believe this to be because the images used in the far left and far right folders were drastically different from that of the other poses. All images in the frontal, right and left folders, displayed two eyes that were clear and aligned. Most images from the far view folders, displayed only one eye, which was used as a dead giveaway for determining if the image to be predicted was classified as one of our far view poses.




Different poses in our dataset
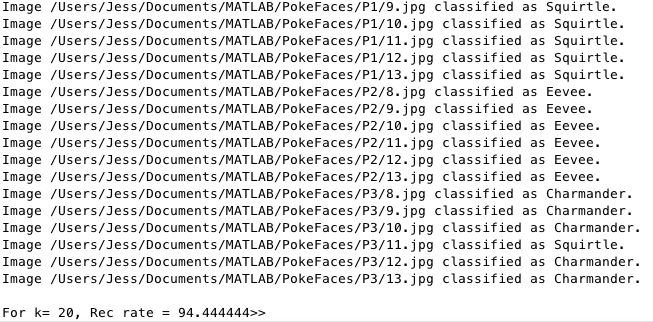
Identifying the Pokemon
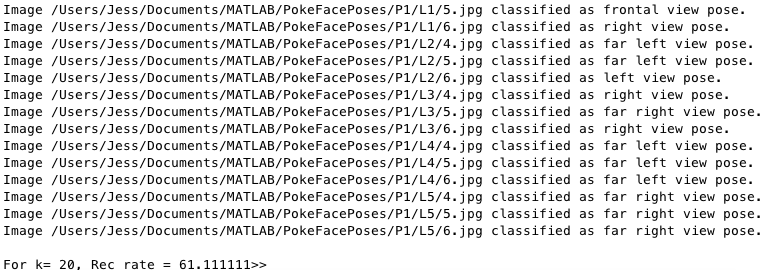
Pose Recognition
Conclusions
We encountered various problems over the course of this project when trying to determine the necessary steps we had to take to get our results. Since we had two different processes, we were confused on which order to do them in. We could either identify the Pokemon’s pose or color first. Eventually, we decided to first determine a Pokemon’s color and then narrow down the pose. We did this for a few reasons. When thinking about the steps we wanted to take, we did not want to identify the pose that each Pokemon was in by comparing it to every other training image we had in the project, and only afterward figure out which Pokemon we were even working with. It made sense to us that we would identify which Pokemon we were working with, then see if our algorithm could still recognize that Pokemon if they were in a non-frontal pose.
Creating our dataset was another issue that we underestimated a bit. Starting with only a few images, we were surprised to find that our data was not robust enough to act as a good project space. After figuring out what images we needed and cropping a substantial amount of Pokemon faces, we had everything we required to make the project work.